
How to add a drop shadow to an image.
Graphic designers often use drop shadows as a simple visual effect. It gives an image dimension by making the object appear to lift off the surface of the background.
A drop shadow is essentially a gray or black (or sometimes color) version of an object’s shape. It’s placed behind the object and its position is offset so only part of the shadow layer is visible. The amount of shadow that’s visible affects the eye’s perception of depth. Usually, the more the shadow is visible the farther the object appears to rise off the background. Conversely, the smaller the shadow the closer it seems to be to the page.

There are any number of layout and design programs that have tools to easily create drop shadows and other effects — for example, Microsoft Word, Microsoft Publisher, Microsoft PowerPoint, Adobe Photoshop and Adobe Illustrator to name just a few. The steps for adding a shadow to an image vary a bit depending on the program you use to create or edit your church publication or images. Check your program’s Help menu to find the exact steps. Here are the steps for the two most common layout programs used by churches: Microsoft Word and Publisher.
Add a shadow in Microsoft Word.
- Insert the image into your Word document and select the image.
- You’ll now see Picture Format in the top ribbon. Click on that tab, and next to the options for Picture Effects, select Shadow and choose your preferred option from the various shadow styles.
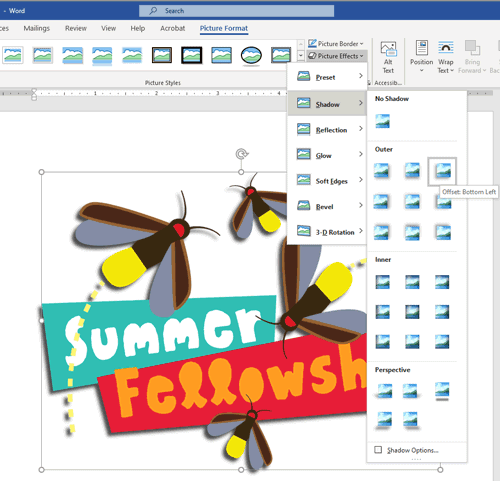
ART TIP: If you want a shadow similar to the one above, be sure to select the new .PNG option when downloading art from ChurchArt.com. Otherwise the shadow will appear on the outer edges of the image not on the objects in the image.
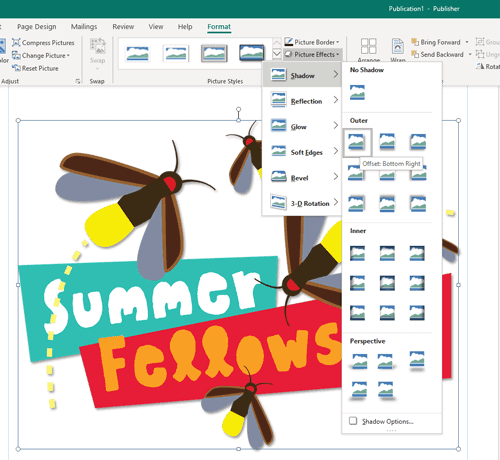
Add a shadow in Microsoft Publisher.
- Insert the image into your Publisher document and select the image.
- You’ll now see Picture Format in the top ribbon. Click on that tab, and next to the options for Picture Effects, select Shadow and choose your shadow option from the various shadow styles.
If you’re using a different program or an older version of Word or Publisher (before 2019), search the Help menu for detailed instructions. You’re usually looking for a Shadow or Rotate feature, and many programs now have a Picture Tools option.
Experiment with the various options until you get the look you want. Above all, have fun with it!
ChurchArt Team
We love art, are passionate about helping churches create professional-looking communications and are a fun bunch of folks. With an in-tune creative director and a rock-solid team of artists, we will provide the art you’ll want to use, plus templates, puzzles and extras that make your job easier.
Share This Post:
All the church-specific art you need IN ONE PLACE.

